Centerpieces have been a rough spot for me. I’ve really had a hard time deciding exactly what I wanted, while staying modern and affordable. One of the main things I was concerned about with it came to my table décor was the size of the centerpieces and whether or not the tables would look empty. I would prefer an overly stuffed table, with no room, than a drab, bare table.
Not having an Ivanka Trump wedding budget, I knew that if I wanted flowers as a centerpiece, I would have to be creative. I could have the florist do a small arrangement and then add more pieces, but if so, what? I could go a different route and not use flowers, but if so, what?
At first, I was really trying to go with a “no flower” route… it would be cheaper and I could always reuse or resell the centerpieces rather than trash them like you would flowers. But unfortunately I didn’t find anything that I really liked that matched the theme of our wedding. Eventually I caved to some sort of floral-ness to be the main attraction at our tables and I finally decided on doing something with succulents. Here are a few of the inspiration pictures that helped me decide:


I decided that I would also somehow incorporate our table numbers into this arrangement… something simple and easy. There are so many adorable ideas for numbering tables, but I do have a few other things in mind outside of the main centerpieces and although I already said I don’t mind overcrowding, I didn’t want the tables to look “cluttered” and confusing. Once again, I don’t want my wedding to look like Pinterest puked all over it… I’m trying my hardest to stick with a simple theme. (Most likely, though, my guests will end up leaving having contemplated whether or not I have mild schizophrenia)
So anyway, after perusing the web for some rustic looking boxes, I came up short. Turns out boxes/planters that look like they are falling apart at the seems can be pretty expensive. Since when did rustic become so ritzy?
Then, I took to craigslist and found a few prospects, but after consulting with my dad about some old barn wood I found, he told me that he already had some! (old fence wood to be exact) So this last Saturday, we got to work building the boxes for our centerpieces…
The box design was very simple, we just used 1"x6"x6' wooden fence slats and produced a 12"x6"x4" rectangular planter box. Below is a basic layout of the design.
 |
| The finished product |
We had a lot of scrap wood and ended up making 16 boxes total (after a few mistakes), but if you wanted to something similar and only make 15 boxes, it looks like this design would only require 7 fence slats... that is if you don't mess up! Even if you bought the fence slats new, this project would still be pretty cheap!
 |
How we cut the wood
The workstation |
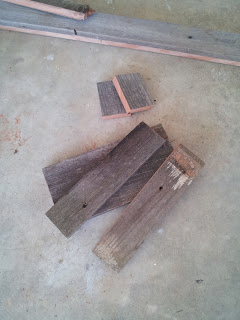 |
| All the pieces for one box |
 |
| Pops |
 |
| Piling up! |
 |
| Pre drilling the holes for the nails |
 |
| Nails! (only 2 per side and 2 for the bottoms, 6 total) |
 |
More nailing
|
 |
| This was my job... Bud! |
 |
| Before |
 |
| After |
 |
| James came over just in time to clean up! |
Overall, this project only cost me about $2, which was the cost of the box of nails, as compared to the "Rustic Barnwood Planter Boxes" from Save-On-Crafts that I was tempted to buy (at $10 a pop!) So I saved myself about $160 in the end. Plus, my boxes are even more enchantingly rustic and are actually made from old wood! That's a solid point for team Do-It-Yoursef... (or team Drink-Beer-While-Your-Dad-Is-Doing-It-For-You) Score!
I can't wait to fill these puppies!


booyah.
ReplyDeletethese rock. the succulents will look so cool.
your party will be amazing.
let's start looking for succulents.
xoxo